IMPORTANT SAFETY GUIDELINES
This Spyder MR3 paintball marker is NOT a toy; It can cause serious injury or death.
Kingman recommends that customers be at least 18 years of age to purchase this product.
Any modifications or tampering of original factory parts will void all warranties and liabilities from Kingman.
Kingman recommends using a barrel plug or barrel sock when marker is not in operation.
All persons using this product, or within range while this product is in use, must wear eye and face protection specifically designed for paintball.
Never shoot at a person or an animal that is not in a designated paintball facility.
Treat every Spyder MR3 paintball marker as if it were loaded.
Never look down the barrel of a loaded or unloaded marker.
Always keep the Spyder MR3 paintball marker on SAFE until ready to operate.
Always remove CO2/Compressed Air source before disassembly.
Fire only 0.68 caliber paintballs.
Spyder MR3 Operation Guide / START UP
WARNING: Always keep the marker powered off or on SAFE until you are ready to shoot.
- To install and charge the battery.
- To turn the power ON, slide the Selector Switch located on the rear of the trigger frame UP to SEMI w/ EYES, SEMI, or AUTO mode. CAUTION: With the power ON, the Spyder MR3 paintball marker is now ready to shoot.
- Cock the Spyder MR3 paintball marker by pulling the Snap T-Cocking Handle (#266) rearward until it latches. CAUTION: If you let go before the handle latches, your marker may fire. NOTE: The Snap T-Cocking Handle will latch the bolt internally, the Handle will not remain in a cocked position after latching the bolt, nor will it move while the marker is being fired. You should hear an audible click and feel a tension release in the Handle when cocking the marker.
- Firmly, attach the CO2/Compressed Air Tank clockwise to the markers Dovetail Bottom Line ASA (#261).
- It is recommended to use a Force Fed/High Speed Electronic Loader that is capable of feeding paintballs into the Spyder MR3 paintball marker at 17 balls per second or faster to avoid chopping paintballs in the markers breach when shooting at high rates of fire.
- Routine lubrication of the marker does not require disassembly of the marker. Put 3-4 drops of Paintball Marker Oil into the Bottom Line ASA (#261), screw in your air tank, point the marker in a safe direction and dry fire (no paintballs in the chamber) 5-10 shots. This procedure will circulate oil through the markers internal parts, thus extending the life of the marker. NOTE: Only use oil that is specifically designed for paintball markers.
- It is a good practice to lubricate your Spyder MR3 paintball marker before and after each use, especially when storing the marker for an extended period of time.
- When you are finished shooting the marker, be sure to remove the Loader and all paintballs before storing. NOTE: There may be a paintball in the breach of the marker, take a couple of shots in a safe direction to make sure that the Barrel and breach are empty.
- Place the Barrel Plug into the Barrel to avoid accidental discharge of the Spyder MR3 paintball marker. Turn the marker OFF and slowly unscrew the air source tank. CAUTION: Do not remove the Tank Valve from the Tank, doing so may cause serious injury or death.
Spyder MR3 Paintball Gun and Compressed Air Tank
Spyder MR3 Paintball Gun Electronics and Settings
Spyder MR3 Paintball Guns Battery Charging
Spyder MR3 Paintball Marker Velocity Adjustment
Spyder MR3 Disassemble Reassemble and Cleaning Internals
Spyder MR3 T-Cocking Removal
Spyder MR3 Anti Chop Eyes
Spyder MR3 Cup Seal Removal
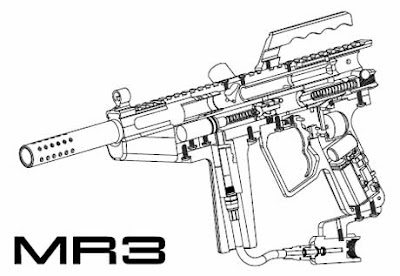
Spyder MR3 Paintball Gun Schematics
How to get free paintball stuff. You have to know about free Target $500 gift card.

